
During the summer months it’s easy enough – unzip my sleeping bag and drape it over the two of us. However, after a few cold nights during a spring weekend spent in the Trinity Alps I decided enough was enough, my sleeping bag was not big enough for me and my adventure pup.
After minimal internet searching, I decided a compact dog sleeping bag for backpacking wasn’t to be found, so I decided to fashion one. Turns out, I’m just ahead of the times; I made Aspen’s sleeping bag in June and Ruffwear debuted their Highlands Sleeping Bag last week. However, at nearly $100, I’d still opt for the DIY route.
 I discovered Rip Stop By The Roll in an issue of Backpacker. I called the company, and the owner suggested 1.9 calendered ripstop nylon, however, they don’t carry that since it’s not in demand. Maybe if enough of us DIY folks make dog sleeping bags that will become an available fabric! In the meantime, I opted for 1.9 uncalendered ripstop nylon for the sleeping bag fabric. Calendered means the fabric has been heated on one side to flatten and seal the weave, making it downproof and more wind resistant. Since I opted to use Primaloft, which is like down but doesn’t have loose down feathers, I decided uncalendered would be fine. As for the number before the nylon, that’s the thickness of the fabric, so 1.9 is thicker while 1.1 is pretty light, especially for scratchy dog paws.
Full disclosure, my directions typically consist of, “just figure it out.” So while I make no promises, I’ll do my best, include pictures, and aim this tutorial at folks with a base knowledge of sewing and access to a sewing machine. Now let’s get started!
Materials for Aspen’s sleeping bag:
– Two sheets of 40″x60″ of 1.9 uncalendered ripstop nylon (Robin Egg Blue)
– One sheet of 40″x60″ Primaloft Gold 3 oz
– Gutermann MARA 70 thread (Robin Egg Blue)
– 6 buttons
– 30 inches of round elastic cord
Once you pick materials, decide the size of your adventure pup’s sleeping bag. Rip Stop By The Roll fabric and Primaloft is only sold in yards. For us visual folks, fold a blanket to the size of a yard and decide if you need one or two yards, then double it since you’ll need to cover the insulation inside and out. For Aspen’s, I ordered four yards of ripstop nylon and two of Primaloft. Once the fabric arrives, lay out the nylon to see how it fits your pup. Aspen’s, when folded in half was 40 inches by 30 inches.
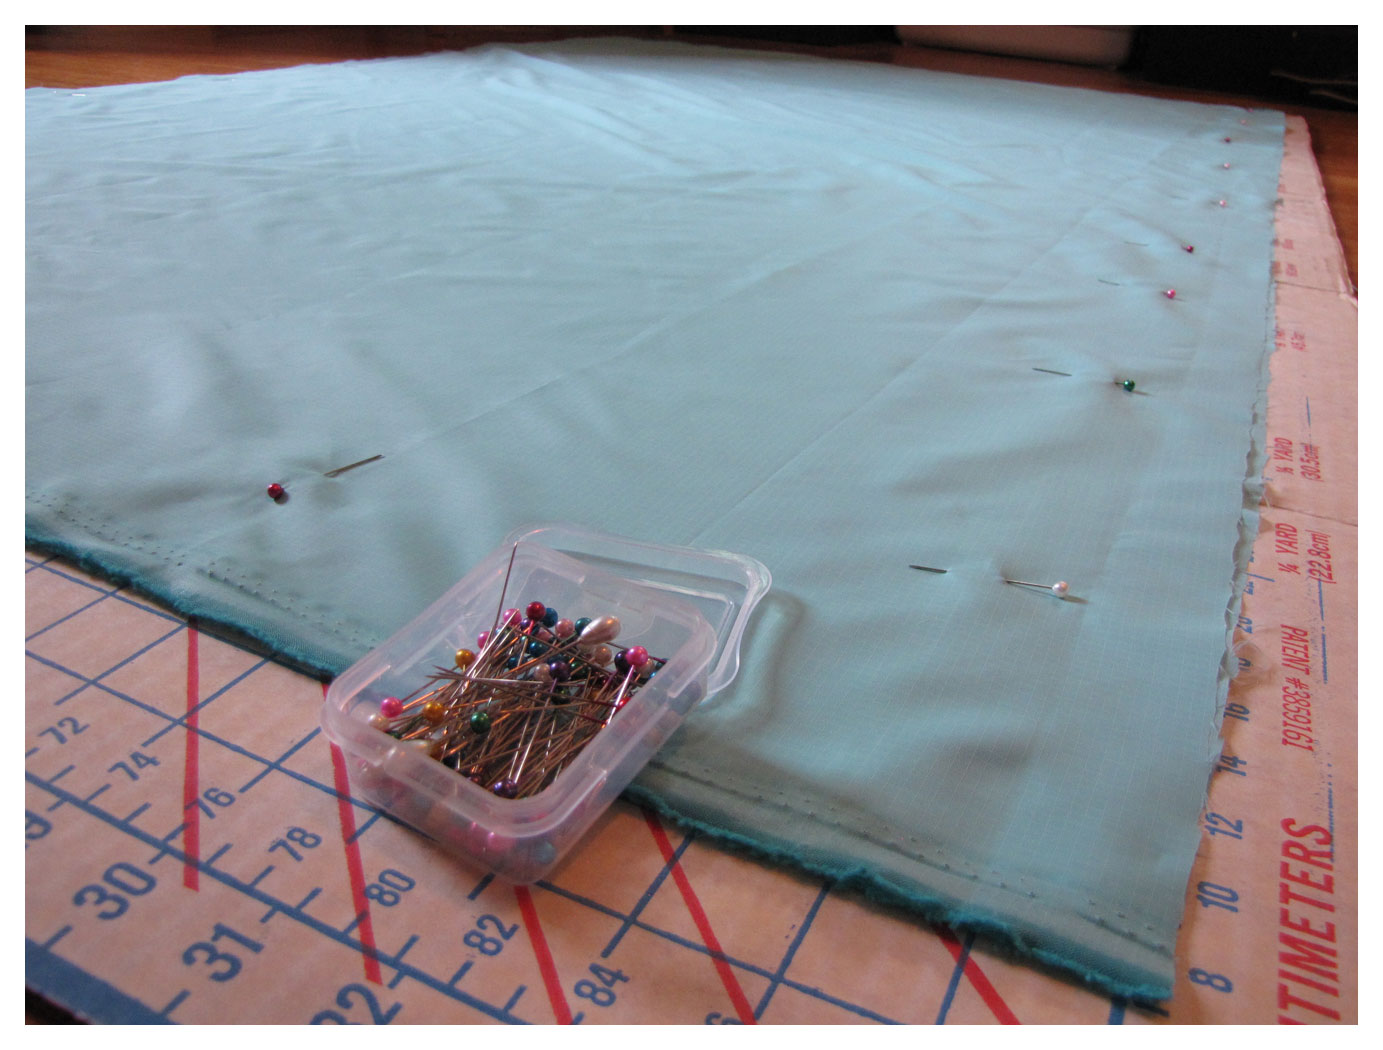
 I’m terrible at cutting in a straight line; I wish I had an awesome fabric counter from Joanne’s with that the groove built in for easy cutting. Anyway, fashion your cutting surface and cut the nylon – two pieces the size of the sleeping bag.
 If your nylon isn’t calendared, there is no front or back to the fabric, which is one less thing to worry about. Sandwich the fabrics together and pin around all four edges. You’ll only sew three sides for now, but pinning the fourth helps keep things together.
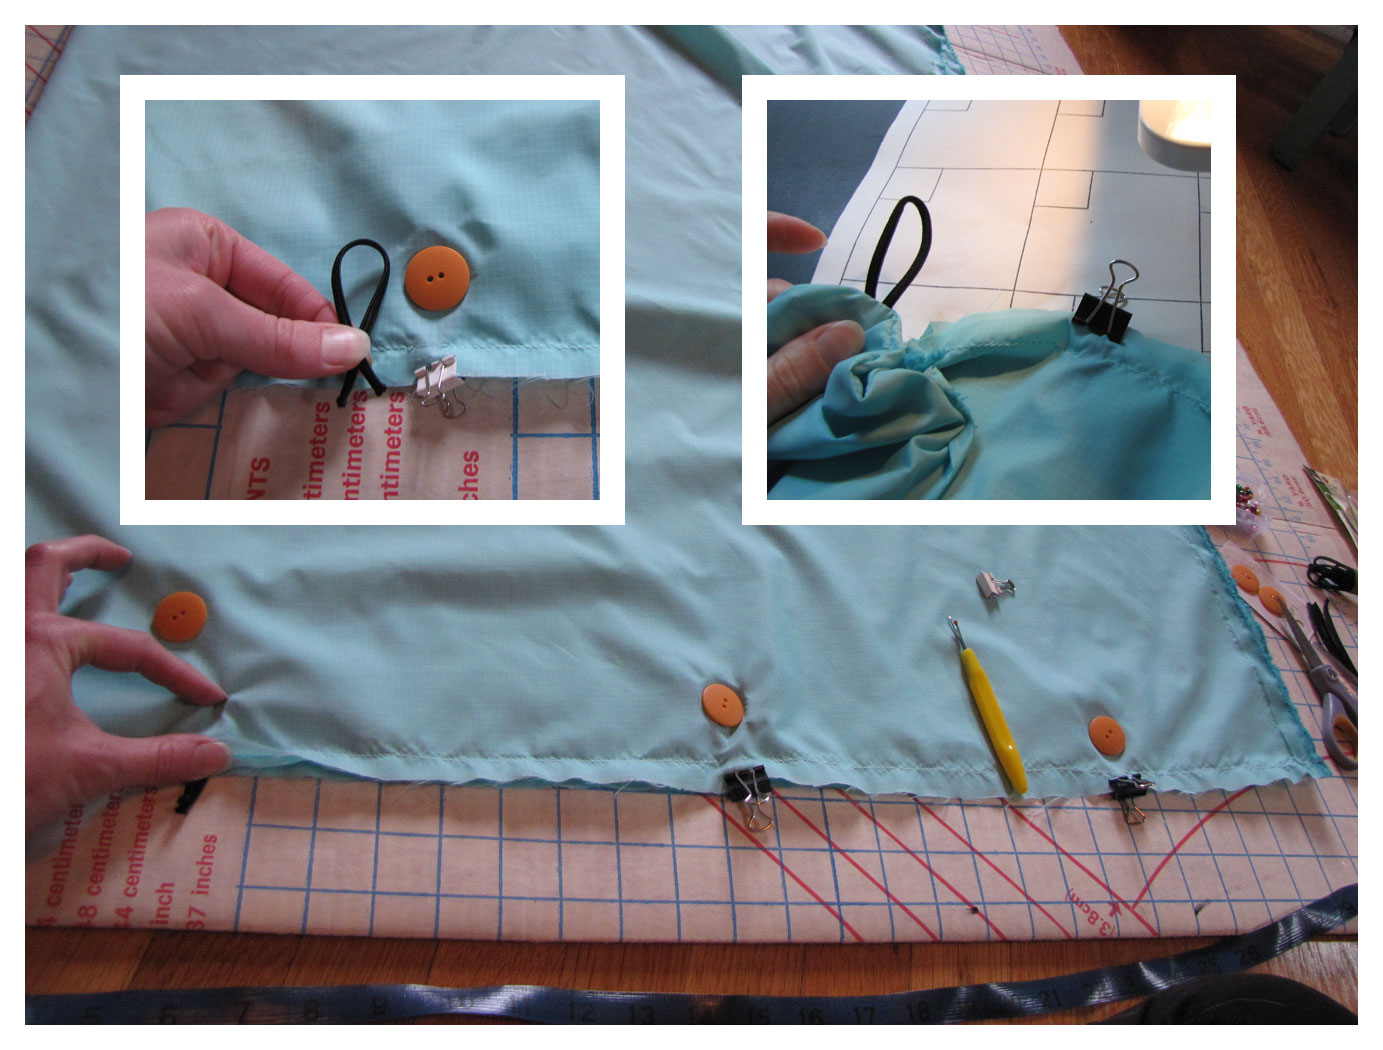
 There are a few options for sleeping bag closures, I chose buttons with loop closures for flexibility of use since Aspen isn’t the best at curling up to get zipped in, as you can see in the first photo. To place the loops, fold the sleeping bag in half and place your buttons along the two short sides. This will give you a visual for where to pin the elastic cords. The cords loop and cross at the end, looking like a simple drawing of a fish. The loop end slips between the nylon with the tail sticking out at the edge. The inset photo below on the left shows what it should look like, but you know, between the nylon layers. The inset photo on the right shows what the loop will look like after they are sewn in. For Aspen’s I used three loop closures per side, for a total of six. Note, I forgot this step initially and had to go back and open the seams to slip the elastic cords in and resew, which is why there are already seams in the photos below.
 Now that the sides of the sleeping bag are pinned and the elastic cords are placed and pinned, with the sleeping bag laid out flat sew three sides, leaving one of the short sides open.
 Once all three sides are sewn, turn the sleeping bag right-side out. Lay the sleeping bag shell over the Primaloft and cut out the size of the sleeping bag. Then put the Primaloft into the sleeping bag.
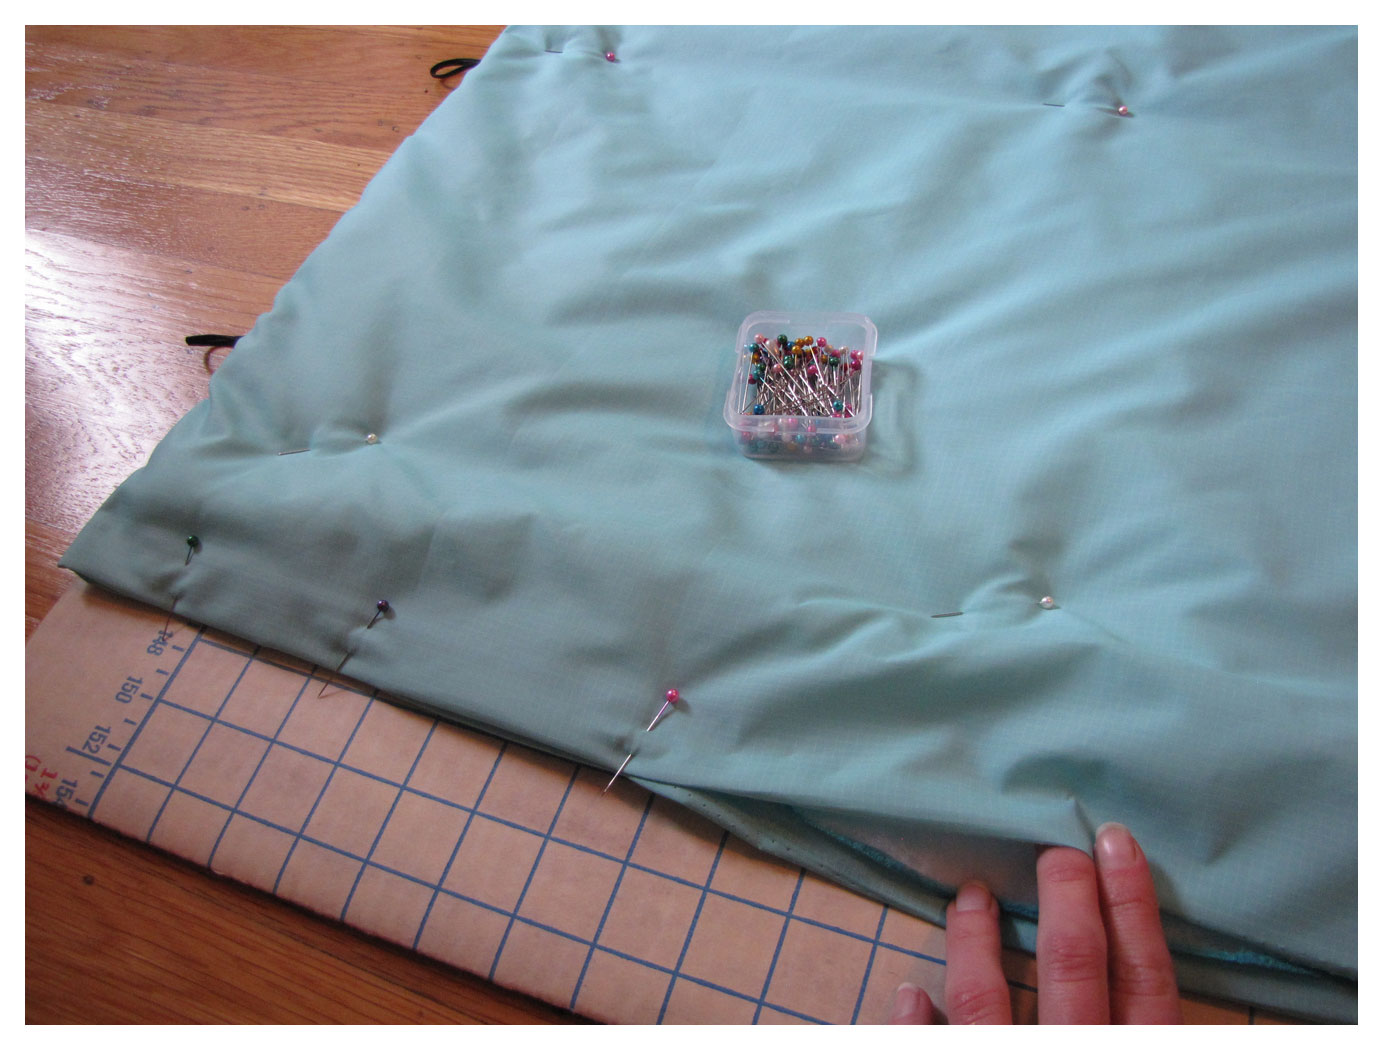
 Pin the sleeping bag at least every 12 inches, but 6 inches would be even better to hold the Primaloft in place until the quilting is complete. Then fold the open end inside itself and pin that closed. Sew the seam closed.
 Here’s the moment of decision, what quilting pattern do you want to fashion? Simple options include squares or a chevron pattern. I wanted something more exciting and decided on topographic lines, but I didn’t want just any topo lines. I decided on a section of the Tahoe Rim Trail that Aspen and I really enjoyed. I zoomed in on the map and drew out the simplified version. Decide on your quilting pattern, factoring in the quilting requirement for your insulation; for the Primaloft Gold 3 oz insulation I used had a six-inch quilting requirement – as topo lines allowed.
  There may be a better way to go about this, but I had my quilt pattern drawing at hand and fired up the sewing machine. Again, be sure your sleeping bag is pinned sufficiently to hold the fabric in place during the quilting process. Mine could have used more pins and got a bit bunched in a few places.
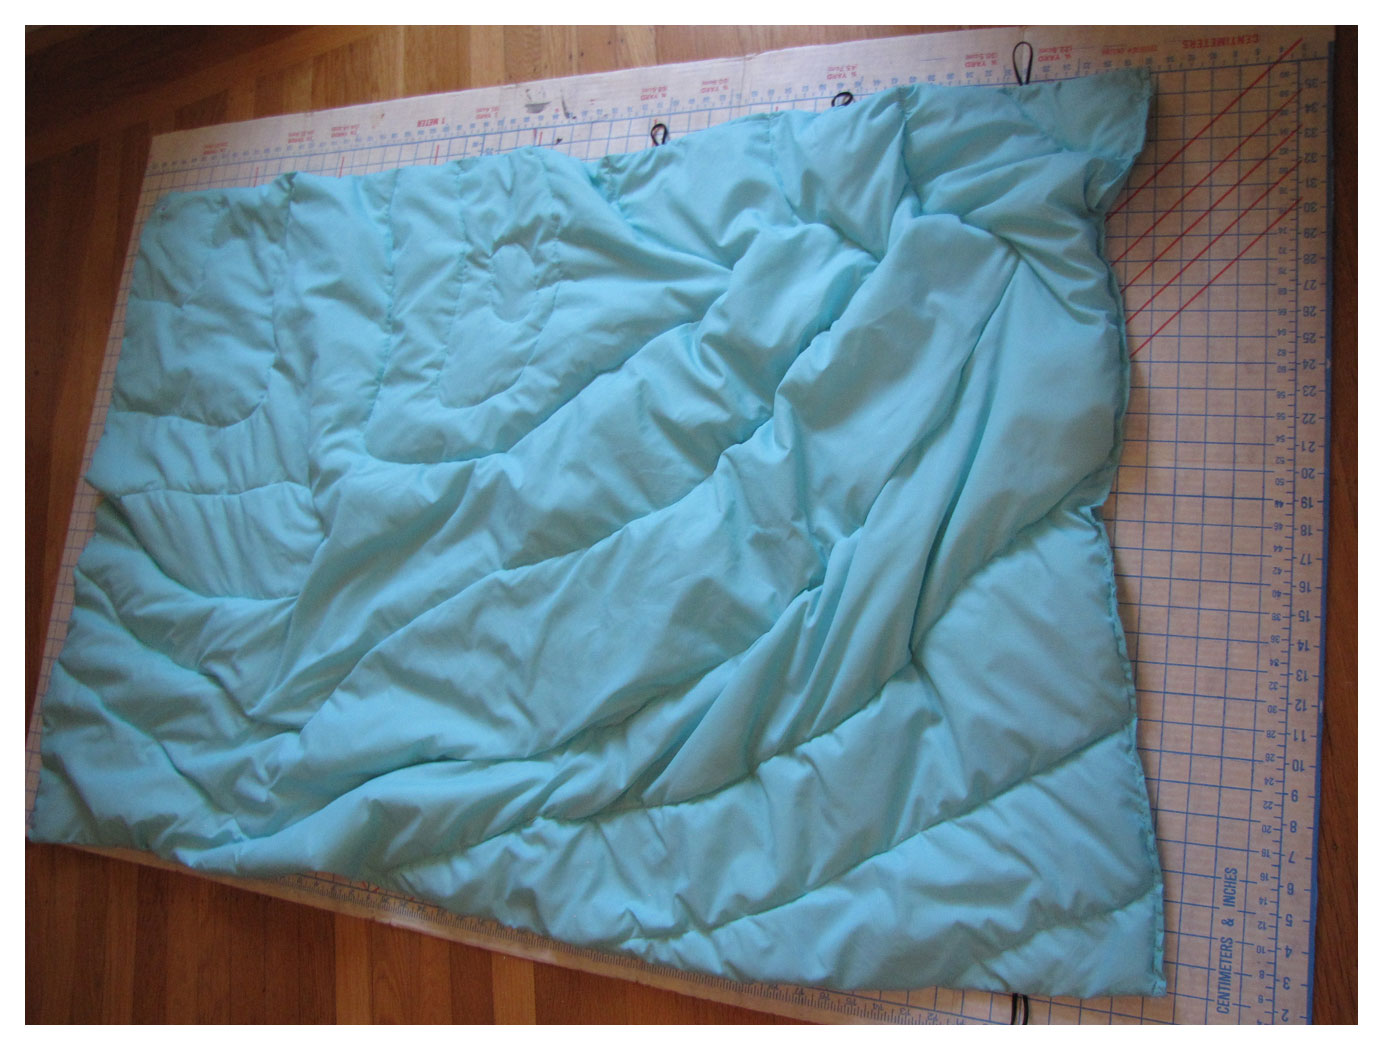 Once the quilting is complete, you’re in the home stretch. Fold the sleeping bag in half and match the buttons up with the elastic cords and sew buttons on the outside of the opposing side.
 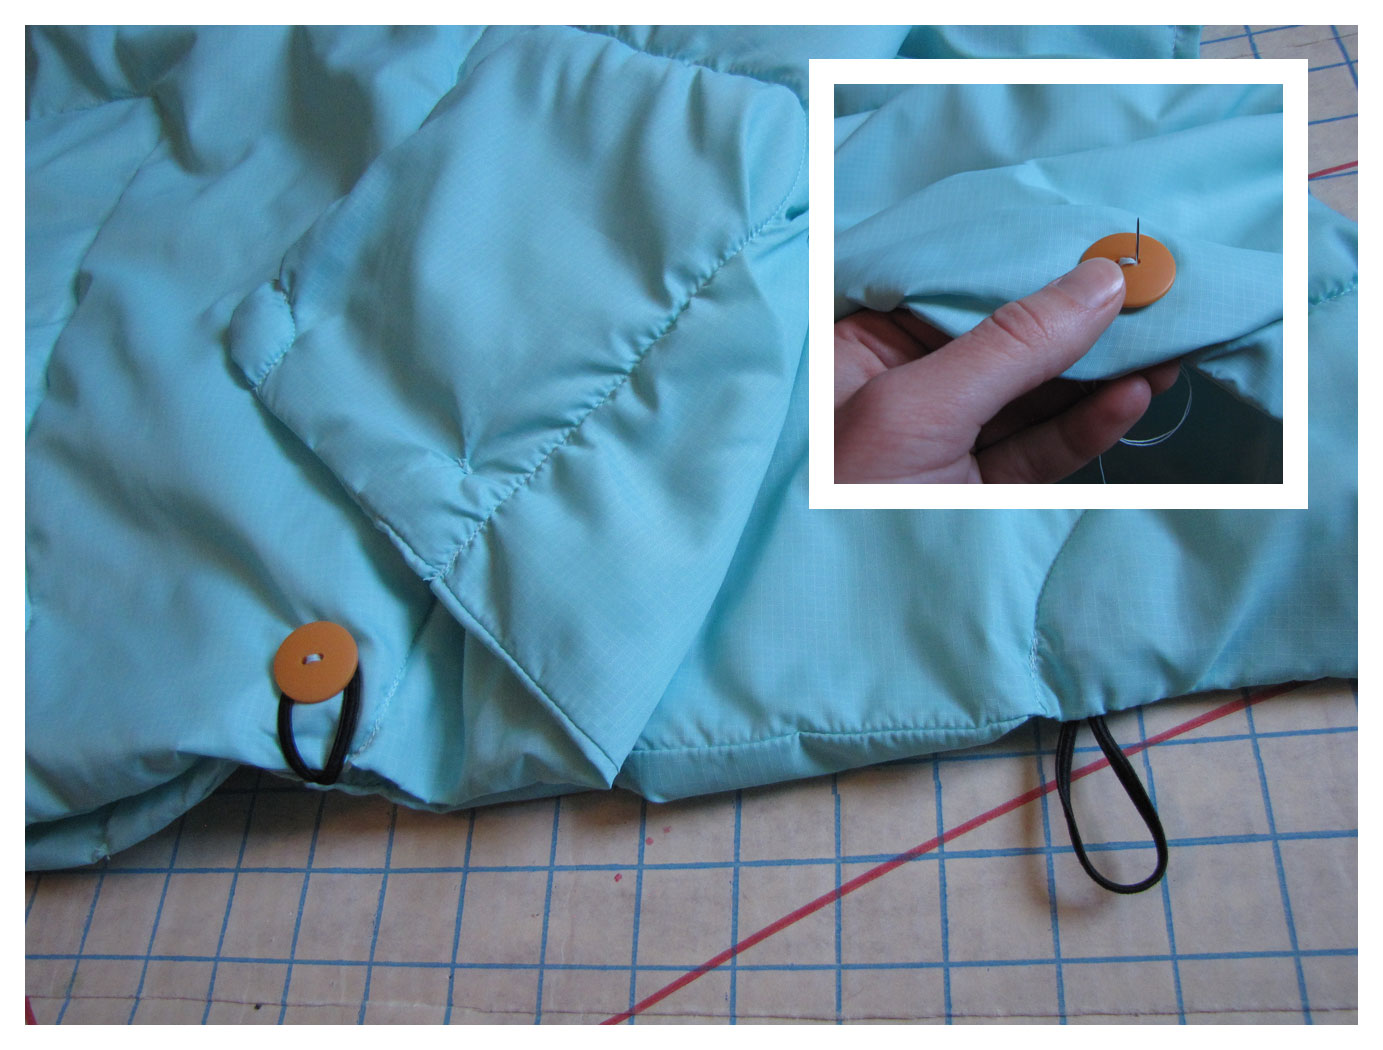 Now for the last step – take your adventure pup backpacking!
 I would estimate with the nylon fabric, insulation, and thread that I used, the materials cost about $35. I’m happy to clarify any of the steps in this tutorial. The other option is placing an order with me! I’m toying with the idea of opening a shop on Etsy and would love some feedback if I should move forward.
I’m happy to report, Aspen is nice and toasty in her sleeping bag and I’m nice and toasty in mine!
Happy and Cozy,
Trails

Pingback: 2015 Blooper Reel | Trails' Guide·
Pingback: DIY: Adventure Pup Down Jacket | Trails' Guide·