
Materials for Aspen’s rain jacket:
– Gutermann MARA 70 thread – Olive Yellow
– 1 yard 2.2 oz HEX70 XL ripstop nylon – Olive Yellow/PU3000/DWR (that stuff at the end means it’s waterproof)
– 1 yard linning fabric of your choice
– 8 low-profile buttons
– 25 inches of round elastic cord
– Reflective tape (enough for two widths of the jacket)
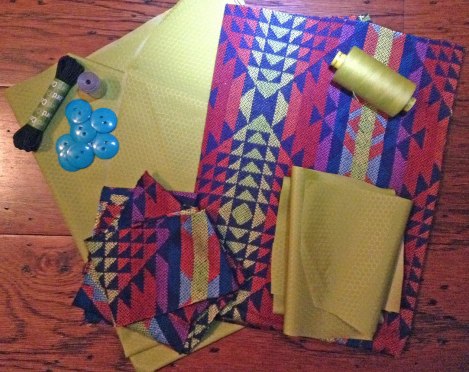
Materials assembled.
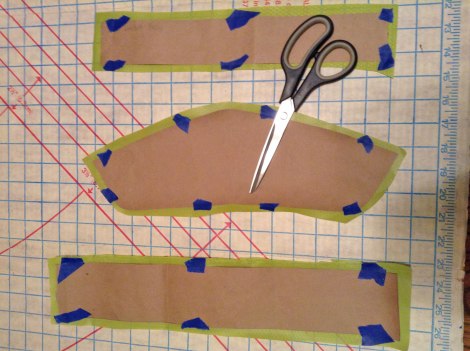
To start, I used the pattern from Aspen’s down jacket as a guide to cut the rain jacket pattern. If you don’t have a jacket to use as a guide, take a guess at the pattern and try it on your dog and adapt as needed. I’ve used brown wrapping paper to build a pattern, it’s more durable than traditional wrapping paper. Paper bags work well too, but you have to patchwork them together. My pattern had four parts – the main body, two straps, and the collar.

Blue tape holds the pattern in place while cutting the waterproof fabric.
Using the patterns, cut out two material pieces for each pattern part with 1/4″ edge for each pattern part – one from the nylon and one from the liner material. Except the collar, both sides should be nylon since the collar will be more exposed to rain. Usually I pin the pattern pieces to the fabric, but I didn’t want to use pins on the nylon since it would compromise its waterproofing. Instead I used blue painters tape, which may be my new favorite sewing tool.
Two belly straps and the collar.
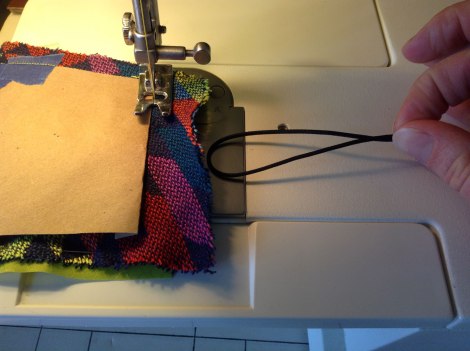
Make the three small parts of the jacket first. Note the nylon has an inside and an outside, be sure the shiny side is facing the other fabric, so when you flip it right-side-out it will be correct. I started with the straps, sewing three sides, with the elastic loop on one of the short ends and left the other short side open. When you go over the elastic loop make a few passes back and forth to insure they stay put – keep this in mind throughout the project. I flipped the strap right-side-out and then folded the hem in on itself and sewed the strap closed. The beauty of this design is, the exposed seam is going to be hidden in the jacket. For the collar, I used a similar method, but left a third of the long end open that will also be hidden in a seam from the jacket body. Make sure the end you leave open is straight – it’s just easier.
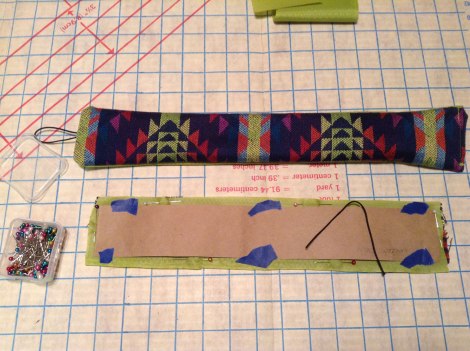
One finished strap and one ready for sewing.

The collar folded right-side-out with the open seam ready for sewing.
Aspen’s friend Laila originally requested the rain jacket. She is a city pup, so for safety she wanted reflective tape on her jacket. The reflective tape at Joanne’s was iron-on, which isn’t recommended for nylon. I removed the iron-on strip and sewed it on instead. I used blue tape to hold the reflective strip in place while sewing it on with grey thread. I’m now dubbing Laila’s jacket, her rain safety jacket. If you’re not adding reflective tape, on to the next step!

Kit believes in safety rain jackets!
It’s time to assemble! Lay the nylon layer over your dog and judge where the best locations are for the belly straps – mark them with tape. Lay the nylon shiny side up. Now add the belly straps, the nylon on the strap will be touching the nylon of the jacket and the liner fabric will be up, with the button loops to the inside of the jacket and the ends sticking out. Lay the liner fabric down next with the side you want to see faced down. The next step is optional, but I like to lay the pattern down on top to guide my stitching. Pin the edges of the fabric together and tape the pattern to the liner fabric. Mark the sewing start and stop point for the collar with tape.

Strict supervisor, always hovering…
Sew the main body fabric, leaving the collar area open to turn the jacket right-side-out. Don’t forget to include the loop closures on both of the front flaps. Just like the elastic, make a few passes over the straps with the sewing machine. Once the jacket is right-side-out, insert the collar and fold the hem of the main body in and tape it for sewing. Then sew the collar on, which is easier said than done, I can’t seem to get the dang thing on with just one pass. I think less curve in the collar area of the jacket body would help.
Insert the elastic loops on the front flaps – one for each flap.
Now it’s time to figure out the placement of the buttons. Try the jacket on your adventure pup and mark the button locations with tape. Since I designed this jacket to be reversible, I sewed two buttons back to back on Aspen’s jacket, plus that hid the button thread on the inside. I will admit, that makes securing the jacket a smidge harder, which is why Laila opted to just have the buttons on the outside. Adventure pup’s choice.

Laila’s safety rain jacket.

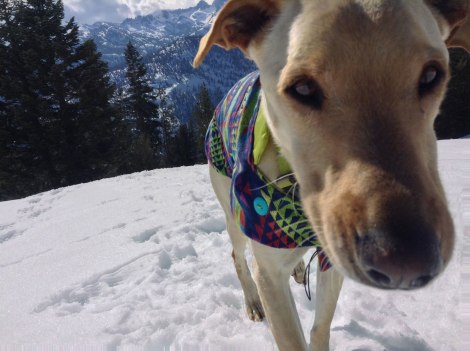
Aspen donning her reversible rain jacket and ready for adventure!
Happy,
Trails

I LOVE THIS ! What a great tutorial. Thanks for sharing 🙂
Thank you hikeratheart!