
Destination: Kepler Track
Mileage: 50.60 km (31.44 miles)/3-4 days
Trailhead: Kepler Track Car Park
Elevation: 178 up to 1,472 meters ( 584 up to 4,829 feet)
New Zealand is full of hikes, tramps, walks – whatever you want to call them. Nine of these are deemed Great Walks and I planned on hiking at least one during my Kiwi adventure. I decided on Kepler for the views, lakes, and location. What they didn’t advertise were the miles of trail through a green tunnel of vegetation or maybe I skimmed over that part distracted by the promise of craggy mountains…
No matter which Great Walk you pick, you need to make reservations. I know the Milford Track fills up faster than a Yosemite campground, while others aren’t as frantic for reservations.

The view of Lake Te Anau from one of the bridges along the trail.
For the start of the hike, add a few miles and walk from Te Anau, take Tracknet from Te Anau, or take off a few miles and ride the boat shuttle across Lake Te Anau to Brod Bay. We drove to the Kepler Track car park since we had a rental.
From the car park, the trail starts on Lake Te Anau’s shoreline and then dives into the forest with glimpses of water here and there. The best views are from the bridges along the trail. Burn through the flat 5.6 km (3.48 miles) to Brod Bay and enjoy a snack from the campground with a view! The Brod Bay campground has water, shelter, and toilets.
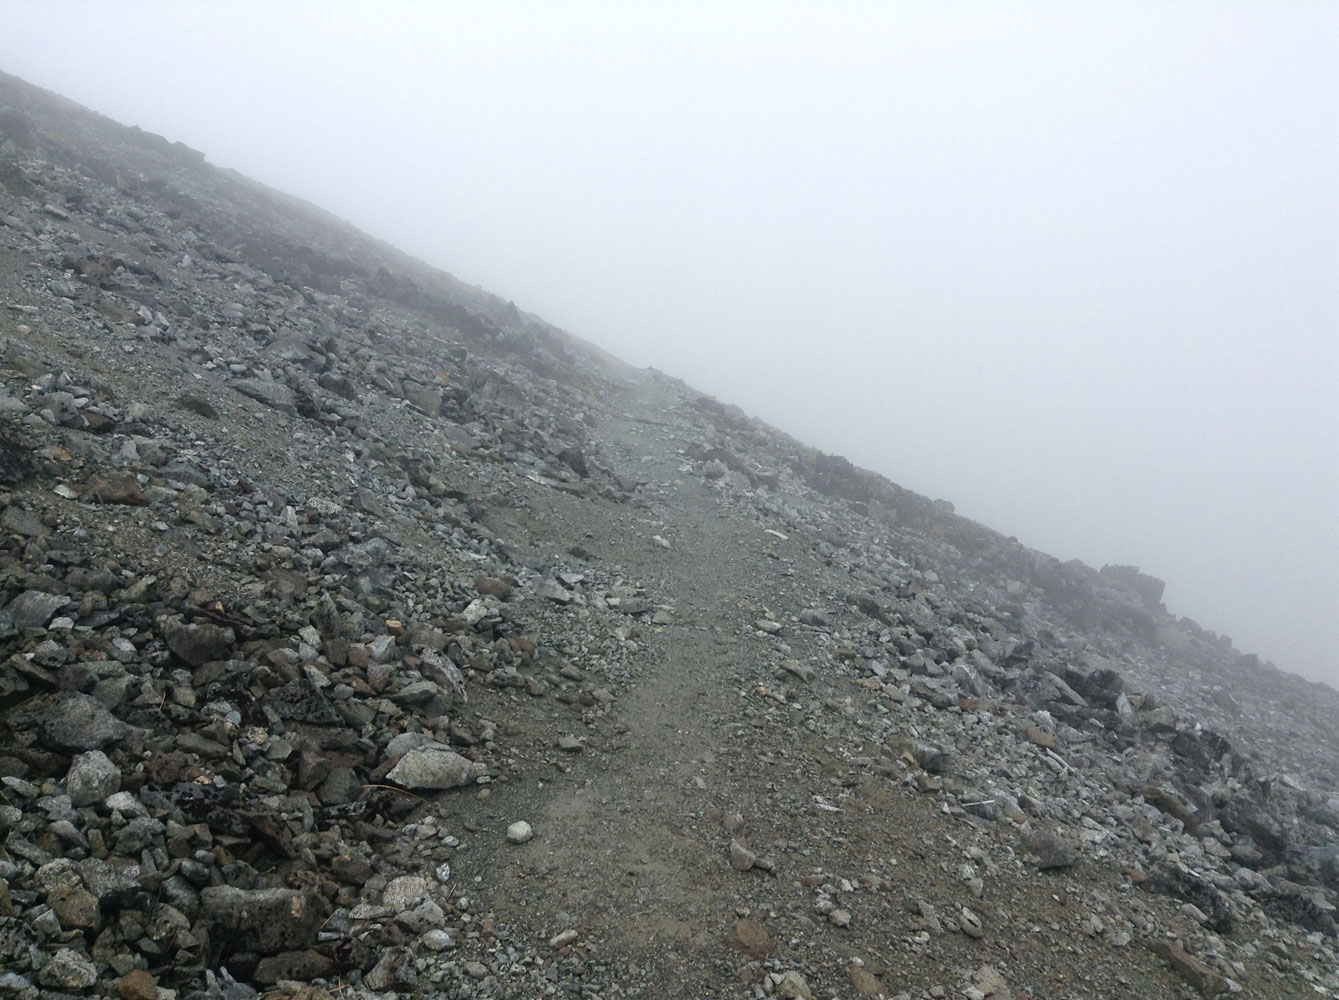
From Brod Bay, the climb begins – 8.2 km (5.1 miles) of climb to be exact. Good luck judging your progress though, because you’re officially in a green tunnel. Just when I started to think I was climbing in circles I came upon a window in the vegetation with a view and had to stop to enjoy the break in monotony. The next trail marker and break for my sanity was the limestone bluffs, which had plank walkways and stairs. You heard me, I just said I enjoyed stairs – that’s how much I don’t like climbing in a green tunnel, I find stairs a respite.

Finally a break in the green tunnel for a view of Lake Te Anau.
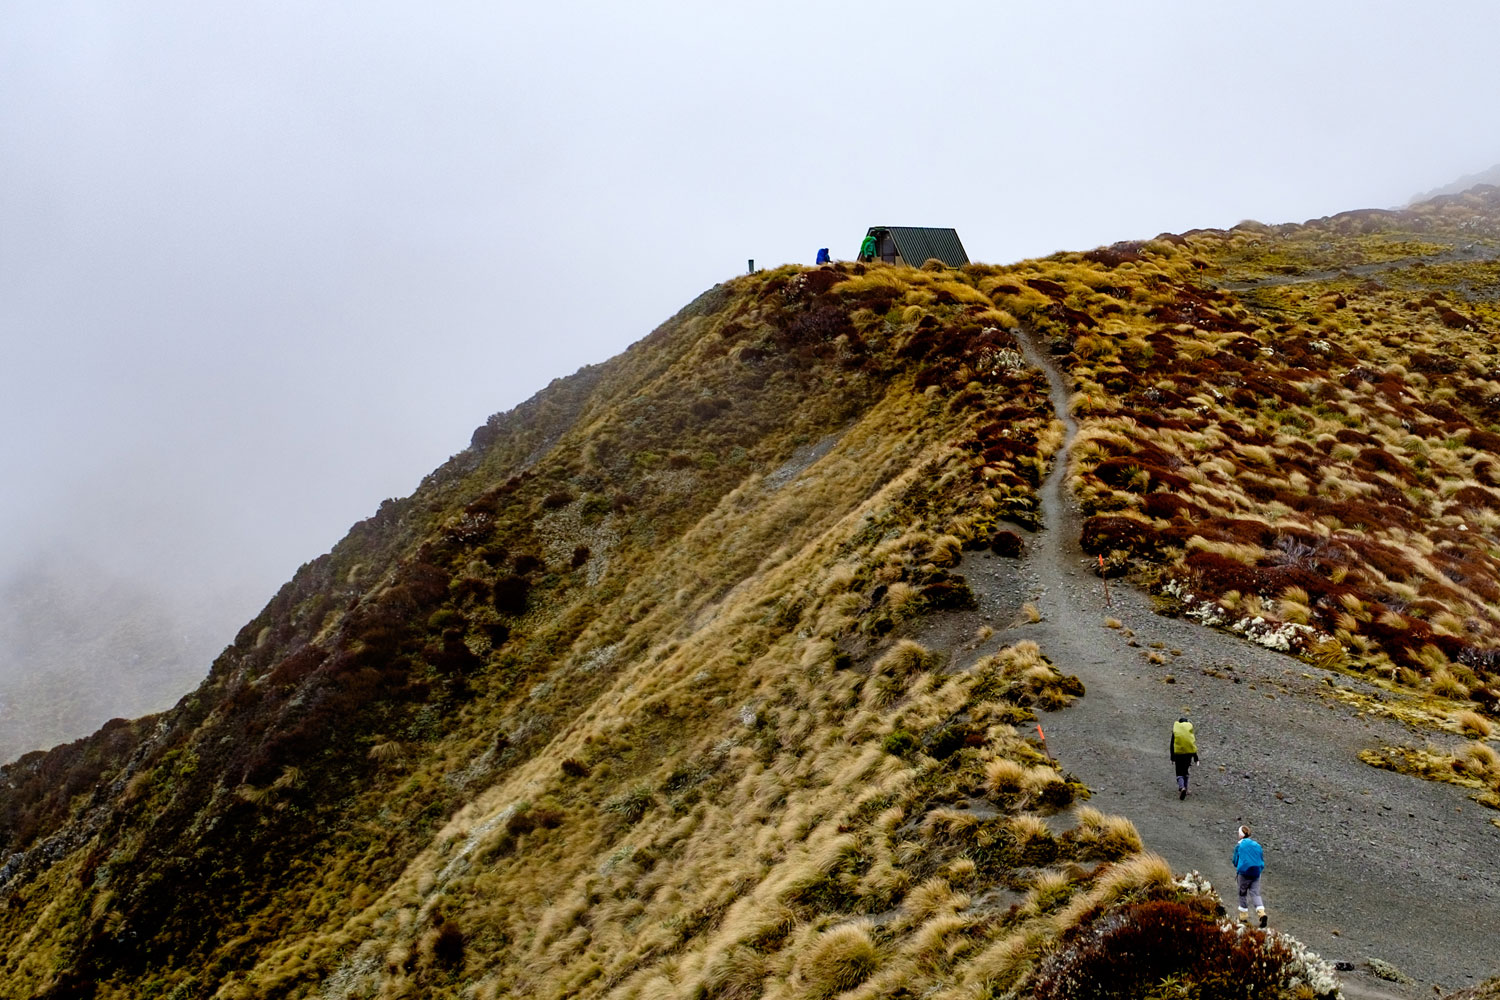
We finally made it to the bushline to find the rain had really begun. For the final exposed stretch we broke out rain gear and I could finally breathe in the open air! Did I say air? I meant wind. The alpine tussock grassland provided no shelter, so we gave new meaning to speed hiking. But at least I could breathe.

Out of the green tunnel into rain for the final stretch to Luxmore Hut. Photo by Compass
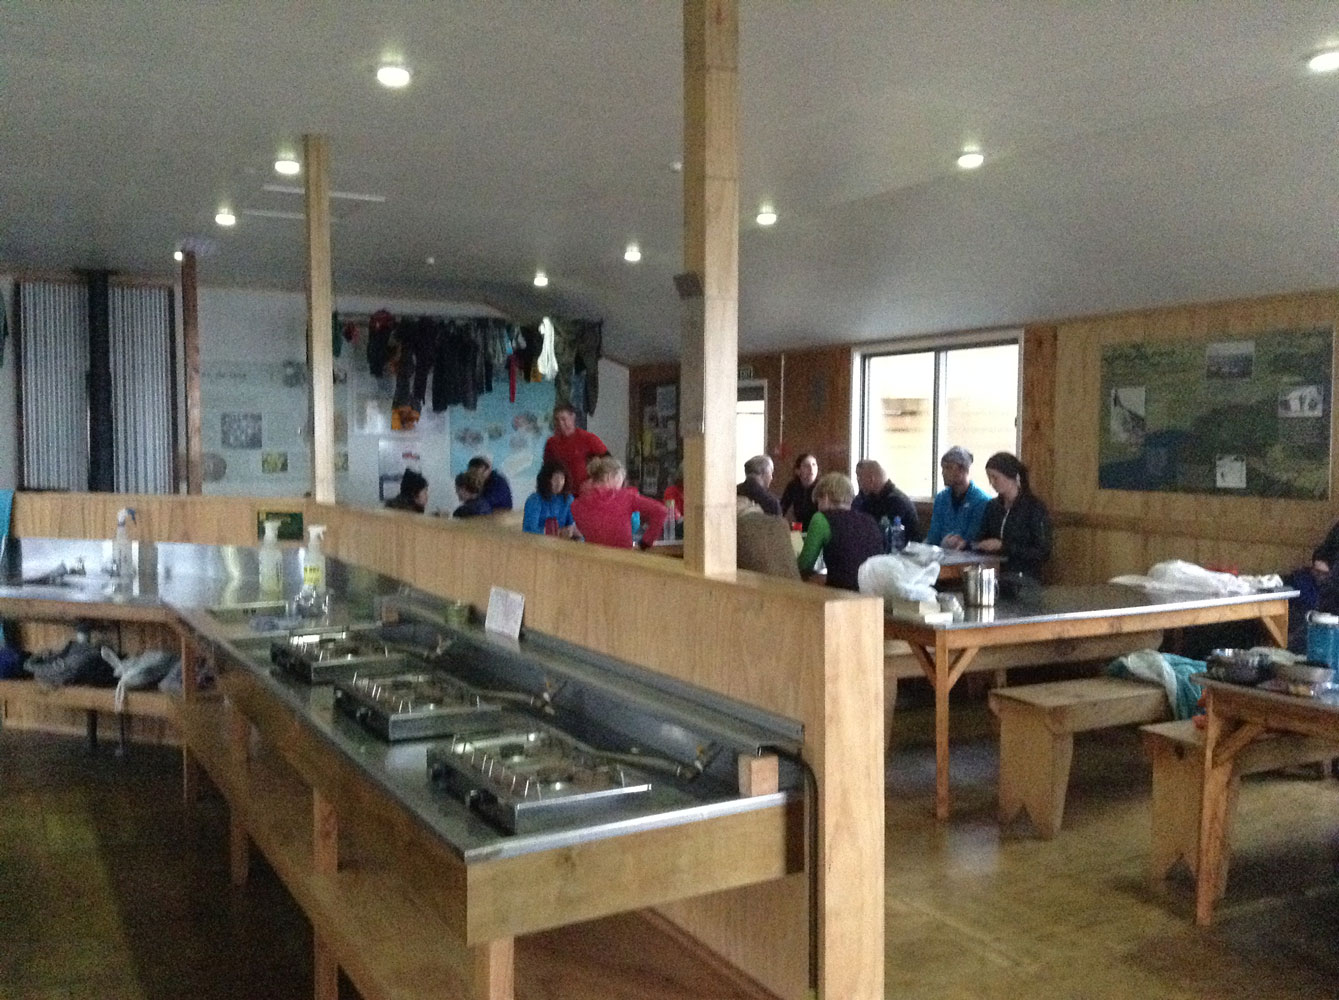
Everyone was piling in Luxmore when we arrived, by the end of the hiker rush there was wet gear hanging from every possible surface. Luxmore has two bunk rooms, one much smaller than the other. My recommendation – nab a bunk in the smaller room, if it’s full, at least nab a bottom bunk, because heat rises and with 40 plus people in the large bunk room, that’s a lot of heat. Which reminds me of a gear recommendation, I don’t care what the forecast says, if you’re only staying in huts, leave your super warm sleeping bag at home, you simply won’t need it. A light sleeping bag will be plenty. Oh and pack ear plugs, because there’s bound to be a few folks that snore…
Back in the common room, we signed in on the bunk assignment sheet and settled in for a long rainy afternoon. The common area at Luxmore has amazing views from every window, but the surrounding mountains were all draped with clouds. I started flipping through my issue of Backpacker and to my dismay realized I’d already read half of it…second gear recommendation – BRING A BOOK. Each hut had some books and magazines, so I wasn’t without material to read, but with the rainy afternoons I would have loved to cozy up with a good book. Once everyone at our table was tired of reading, we got out the deck of cards I packed and got to know our bunk mates.
The common area of Luxmore Hut.
All three huts on the Kepler Track have running water that is not treated, but that seems typical for New Zealand. At each hut during the nightly safety talk/ticket check, all of the hut wardens boasted about drinking the water untreated for years and having no issues. If you really want to be cautious, you can boil the water before drinking. The huts also have stoves with fuel, toilet paper, and mattresses. Did you feel your pack getting lighter just now? Mine certainly didn’t, because I filled that extra space with adult beverages and dessert.
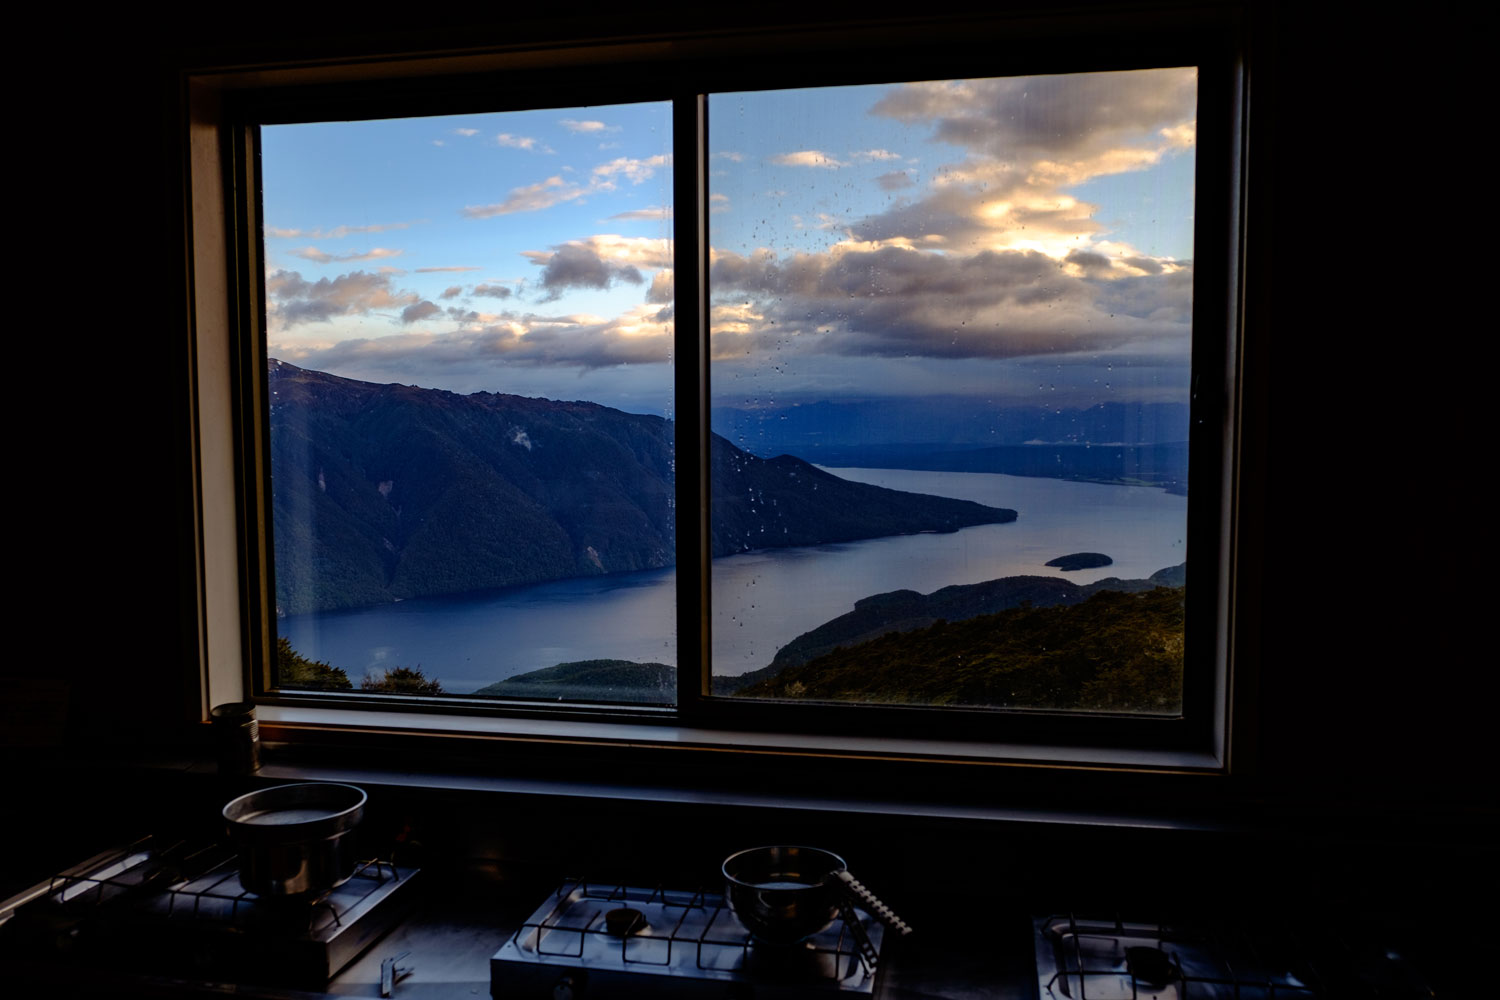
With this kitchen view, I could get more into cooking. Photo by Compass
The clouds cleared long enough in the morning for us to run over to Luxmore Cave, but we didn’t dare venture too far in as the floor of the cave was slick with rain water. If you take this worth-while side trip, be sure to bring two light sources and watch your footing.

Looking out of the Luxmore Cave. Photo by Compass

The morning view of Luxmore Hut and beyond. Photo by Compass
As we left Luxmore the sun made a brief appearance, so we had great views of Lake Te Anau and the surrounding mountains with dramatic clouds.

The Murchison Mountains in the distance.
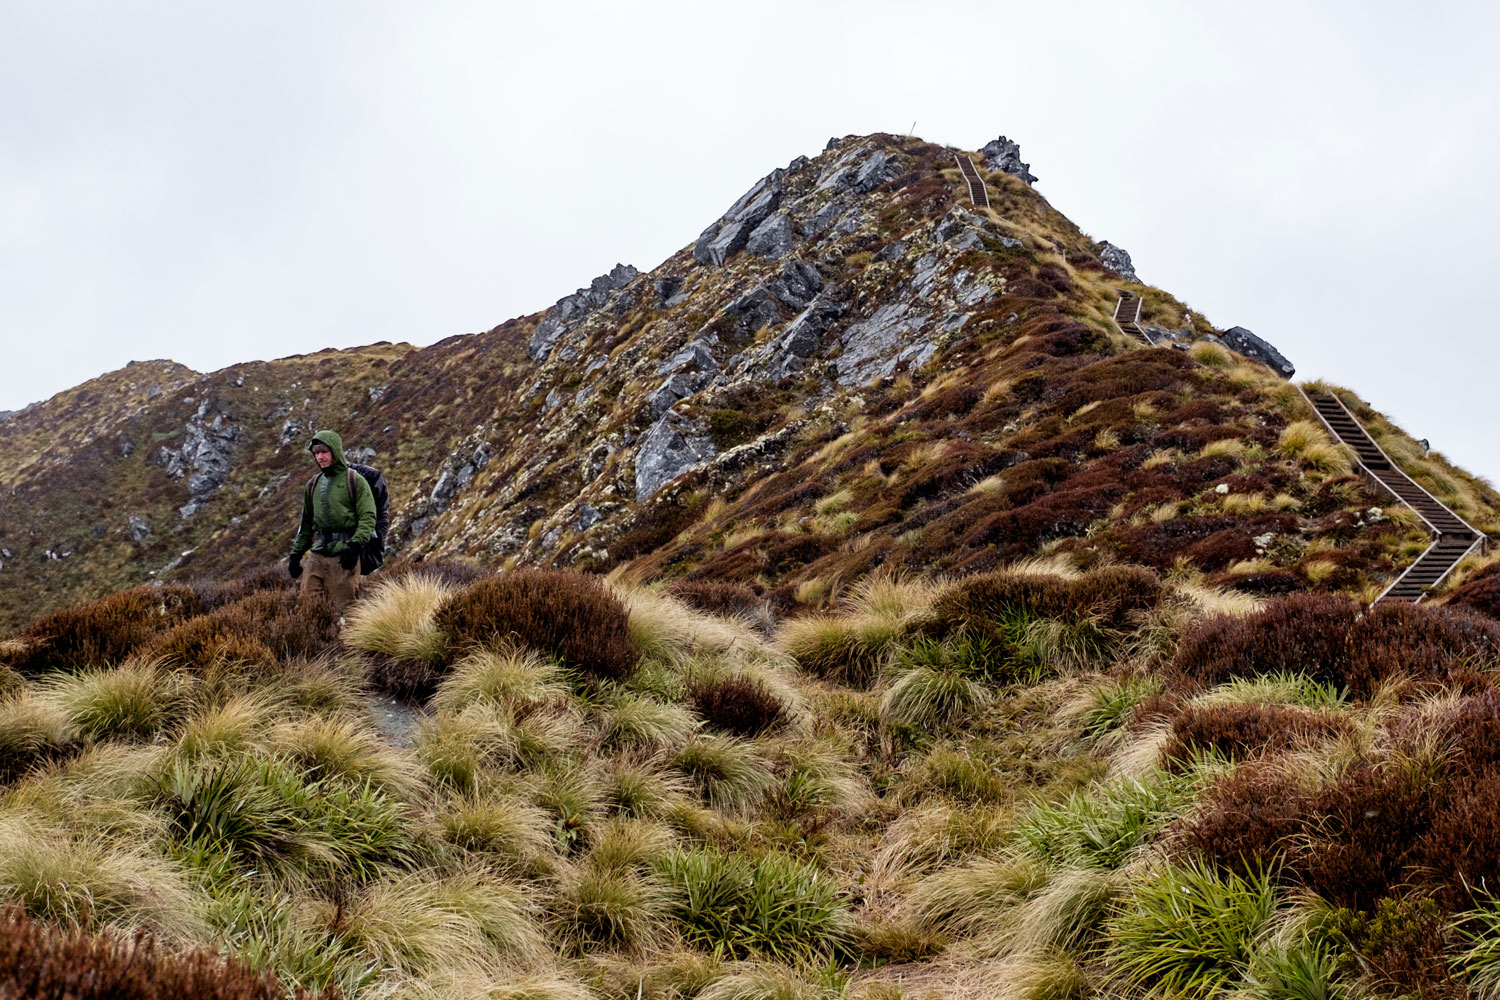
At some point in this stretch, there’s a short detour to the peak of Mount Luxmore, but you’ll have to let me know how amazing the view is, because our heads were in the clouds when we passed the trail junction and opted to keep hiking.
Into the clouds…
There are two huts along the alpine stretch of Kepler – Forest Burn and Hanging Valley. Both shelters have a bench inside and a bathroom outside that looks to be hanging precariously onto the cliff. It adds to the adventure; at least that’s what I kept telling myself.
Hiking up to the Forest Burn Shelter. Photo by Compass
For the stretch between the two shelters, the clouds cleared from time to time, giving us a little glimpse of the view. That Fiordland, what a tease!
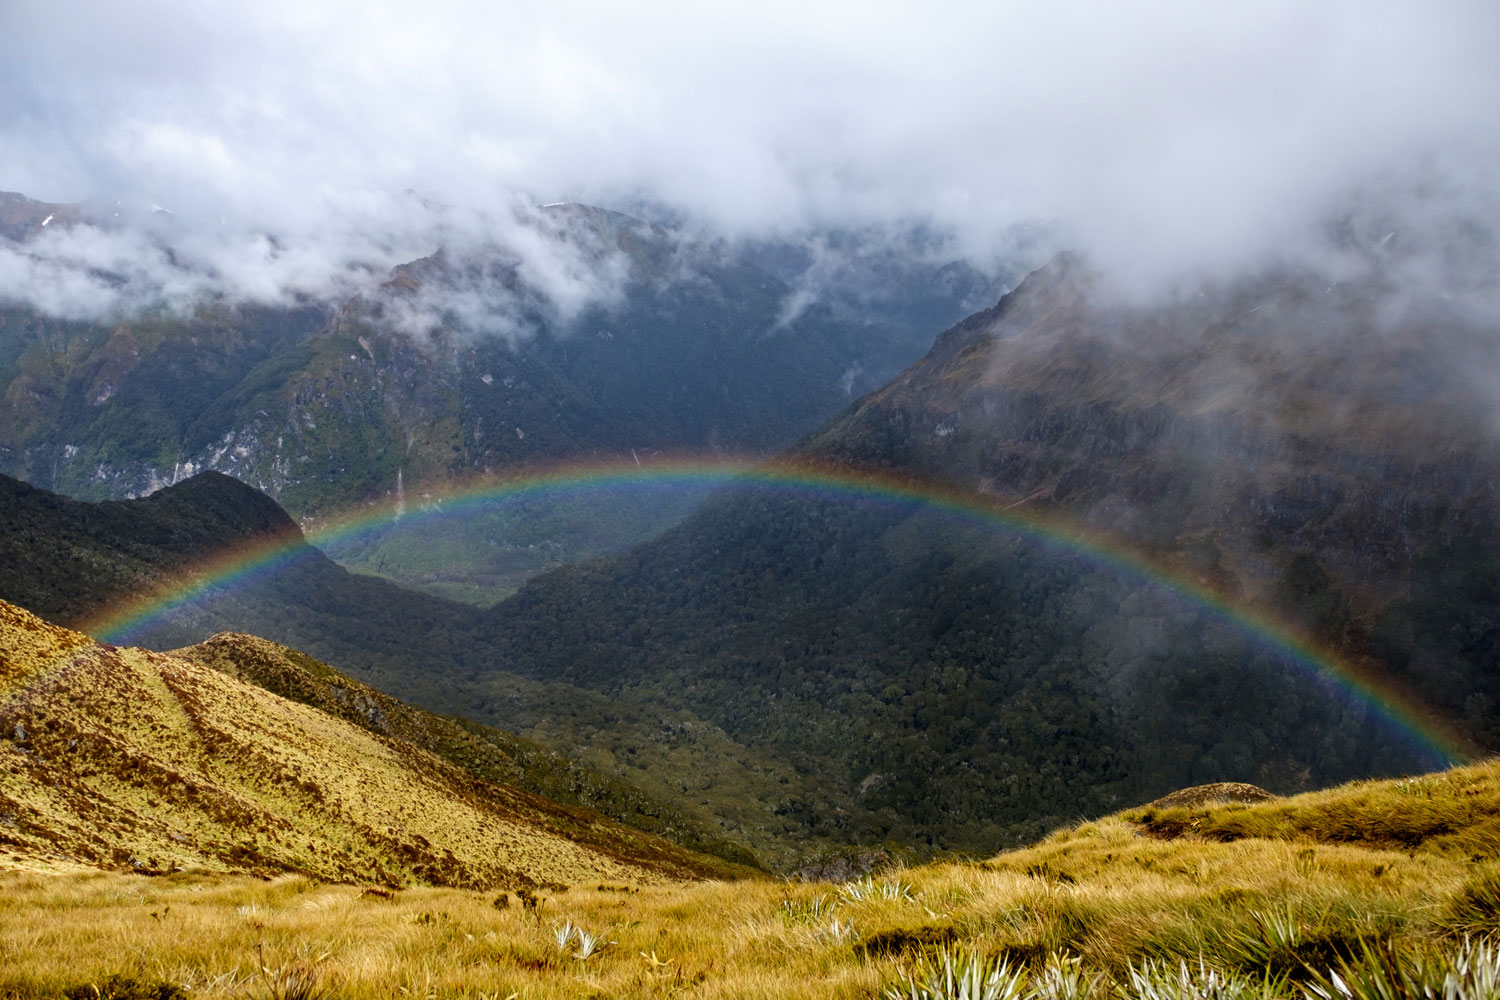
If we couldn’t have mountain-top views, I’ll take a rainbow view! Photo by Compass
The knife-edge ridge really begins after the Hanging Valley Shelter with Lake Te Anau in the distance, the Iris Burn river valley below, and little tarns here and there. Watch for the New Zealand falcon, you’re hiking at soaring level. Once you descend back into a green tunnel watch for little marshmallow birds; they may even rival the Sierra’s Pygmy Nuthatch in cuteness. If you say that’s preposterous, have a look at this green marshmallow – tītipounamu.

Starting the descent from Hanging Valley Shelter. Photo by Compass
Get the trekking poles ready, the descent to Iris Burn Hut is taxing on the knees. Photo by Compass
After arriving at Iris Burn Hut and claiming our bunks we took the side trip to Iris Burn Waterfall before the rain returned. There was mention of a swimming hole at the waterfall, but with all of the recent precipitation it looked like a quick dip could turn treacherous way too fast for my liking. We opted to take a few photos and then try to have a conversation with our new friends over the roar of the falls.

Harper Fawn at Iris Burn Waterfall.
Iris Burn Hut claimed to be the best hut in New Zealand, I disagree. It may of had a running chance, but its score took a serious hit when I sat down to take my boots off and was immediately covered in a swarm of sand flies. During the trek it was pretty chilly so these pesky buggers didn’t have much biting opportunity, but I’ll warn they’re like biting ninjas! I can hear most misquotes coming, but these flies have stealth mode. If you’re going in the warmer season, be sure to bring repellent.

The sand flies at Iris Burn Hut…
Originally we were planning on camping at Iris Burn, but looking at the rain-filled forecast as the trip approached, I switched our reservation to the hut and couldn’t have been happier with this decision. I typically don’t like hiking in the rain, but knowing shelter awaited me at the end of each day made the rain trivial. My trusty umbrella probably helped too.
During the Iris Burn safety talk our hut warden busted out an amazing kiwi call and told us while we probably wouldn’t see one no matter how much we wandered around in the night, we may hear one. At some point in the wee hours of the morning, my eyes shot open to “the ascending whistle” of the male kiwi followed by the female’s “lower horse-like purr call.” Apparently I’m terrible at describing bird calls unless I can equate it to food (my cheeseburger bird call is spot on), so those descriptions are from the DOC signs at the hut. If you can’t make it to New Zealand, hear them for yourself here.

A cloudy view from Iris Burn Hut.
Leaving Iris Burn, you have two choices – hike 16.2 km (10.07 miles) to Moturau Hut or finish your hike. To finish your hike, you have two more choices – hike 6 km more (3.73 miles) to Rainbow Reach car park and Tracknet the rest of the way or 15.5 km (9.31 miles) all the way back to Kepler Track car park – more about that stretch of trail momentarily.
In the meantime, the trail dove back into a green tunnel. Yay… This time I was armed with outdoorsy podcasts to help me pass the miles. I promise I only put one earbud in so I could still hear the bird calls.

Back into a green tunnel…
I absolutely loved the break from the green tunnel near the landslide they refer to as the ‘big slip’ where the valley floor really opened up and the clouds lifted enough so we could see the multiple waterfalls and snow covered peaks.

Looking back up the Iris Burn river gorge after a stormy night.
Again, watch out for those cheeky kea! I set my umbrella down to take the above photo, then turned around to pick it up and found this dirty little thief trying to take off with it.

A cheeky kea tried to nab my umbrella while I took the above photo.
Looking back, I may have skipped the Moturau Hut, but I would have definitely stopped for a swim along the shoreline before hiking out.

The beach at Moturau Hut. Photo by Compass
From Moturau Hut we got an early start to make it for our Tracknet pick up at Rainbow Reach. We opted to skip the section between the two car parks, and after my claustrophobia I was happy to escape an additional 9.5 km (5.9 miles) of green tunnel.

The bridge to Rainbow Reach car park. Photo by Compass
Throughout this post I mentioned a few gear suggestions, but just so they’re all in one place: a lightweight sleeping bag, camp shoes, book, cards, umbrella, ear plugs, adult beverages, and dessert. Enjoy your Great Walk!
Happy,
Trails
